OpenAI Function Calling: An example using the Assistants API Functions tool
Are you looking to expand GPT's capabilities? Check out this tutorial for a complete example of an AI Assistant that can send emails whenever we ask it to.

If you're just getting started with the new Assistants API, I suggest you start here where I go through all the steps to create an AI Assistant using the user interface and the API.
New updates on 17th of April 2024 from OpenAI
OpenAI announced significant updates to the Assistants API. The update includes enhancements aimed at improving the capabilities and performance of the assistants.
- Knowledge retrieval now supports up to 10,000 files.
- More control over token and model configuration.
- Streaming support.
You can read about the latest update on the official website here.
Introduction
If you've been playing around or building something using the OpenAI API you've probably run into the Function Calling feature. We're going to build an example app that implements the Assistants API and makes use of the Function Calling tool to send an email.
The Function Calling functionality in AI Assistants is usually referred to only as Functions.
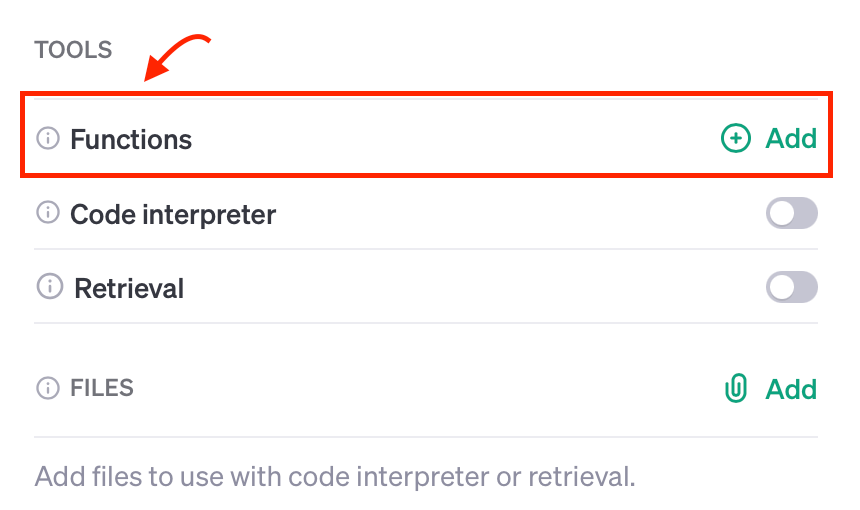
OpenAI AI Assistants Tools
As we've seen in the screenshot above, the Assistants API uses tools to perform actions. The following OpenAI built-in tools are currently available:
- Function Calling (aka
Functions) - Code Interpreter
- Knowledge Retrieval (Retrieval)
We'll look at the Code Interpreter and Knowledge Retrieval tools in a future post. For this one, we'll build an AI Assistant that uses the Functions tool to call a custom function in our code.
What is Function Calling?
New OpenAI models gpt-3.5-turbo-1106 and gpt-4-1106-preview can detect when a function should be called. This means that the models will invoke a function that you specify and will pass the necessary parameters in JSON format which match the function's signature.
This means that you could extend the model's capabilities such as calling a send_email function.
Why use Functions?
Suppose you're having a conversation with the chatbot and you ask it to do something beyond its native capabilities such as sending an email or querying your SQL database.
How would you do this? Well, within your application code, you will let your model know that for specific user requests it could request the calling of a function to perform a custom action.
How to use Function Calling
Let's assume that we're creating an AI assistant that generates random funny quotes. Occasionally, the user may ask the assistant to send the quote by email.
Generating funny quotes is already within GPT's native capabilities but sending emails is not. Let's see how we can make the model call a function that sends an email to our user.
Let's get started!
Creating the AI Assistant using the API
The Assistants API is a new feature that was introduced by Sam Altman during the DevDay keynote on Nov. 6, 2023. It allows us to create AI Assistants for our applications.
To add this function, we'll need to go through the steps below:
- Prepare environment
- Create our AI Assistant using the Assistants API (This could also be done via the web interface. For more info see this post.)
- Include the custom
Functionas one of theTools - Prompt the model by asking it to send the quote in an email
- Check whether the model wants to use the custom
Functionfrom its toolset - Call the
Functionwithin our code - Let the model know that we executed the custom
Function - Get the final response back from the model

Step 1: Prepare environment
First things first, we'll need to create our new directory, a virtual environment, and install the OpenAI Python SDK.
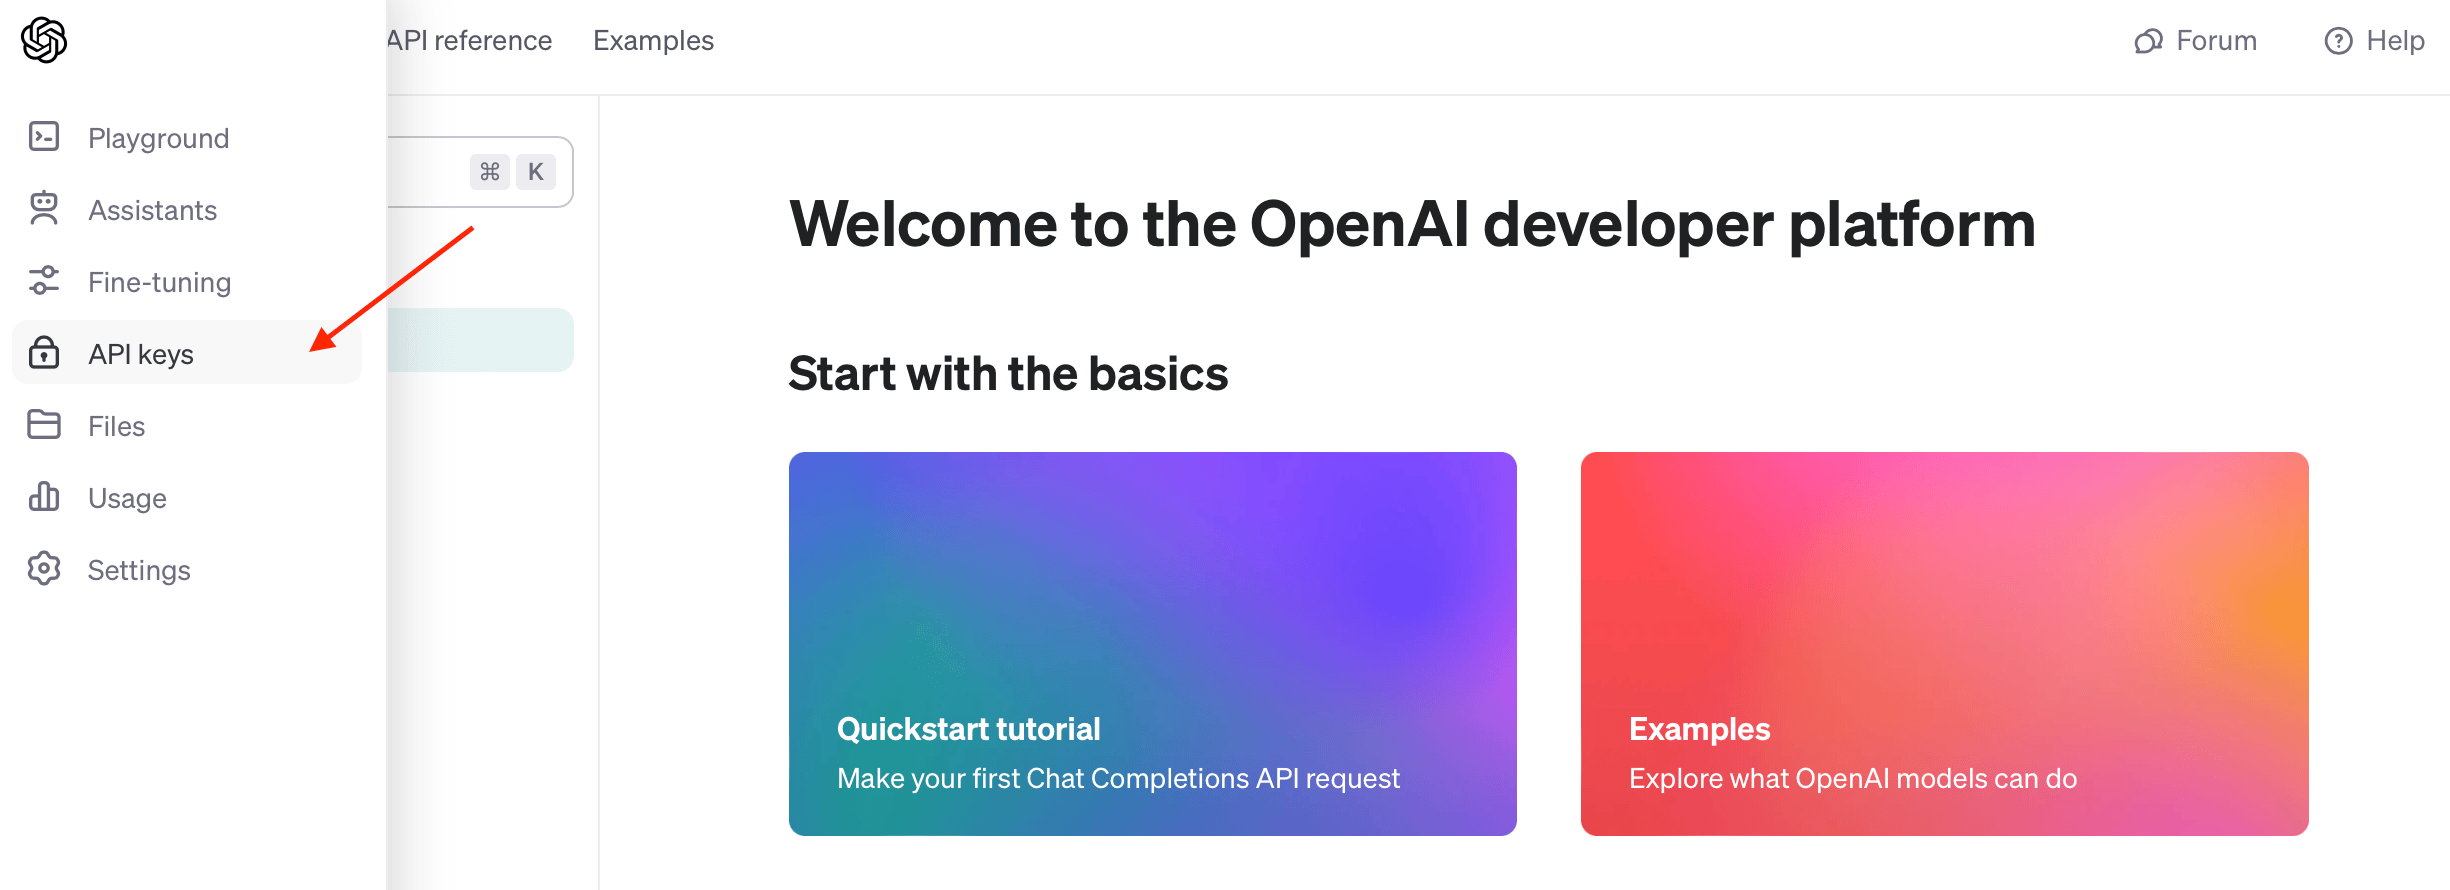
Grab your OpenAI API Key
Head over to your OpenAI account and create a new API key that you'll be using for this application.
Set up Python application
Let's create our new directory. I am going to call it openai-function-calling:
mkdir openai-function-callingLet's cd into the new directory and create our main.py file:
cd openai-function-calling
touch main.py
Now, we'll create and activate our virtual environment:
python -m venv venv
source venv/bin/activate
Install OpenAI Python SDK
Great, with the above set up, let's install the OpenAI SDK using pip:
pip install openai🎉 Boring stuff done.
Step 2: Create the assistant
To create our shiny new AI Assistant, we'll use the following function client.beta.assistants.create, in your main.py file add the following:
from openai import OpenAI
client = OpenAI(
api_key="YOUR_API_KEY",
)
def create_assistant():
assistant = client.beta.assistants.create(
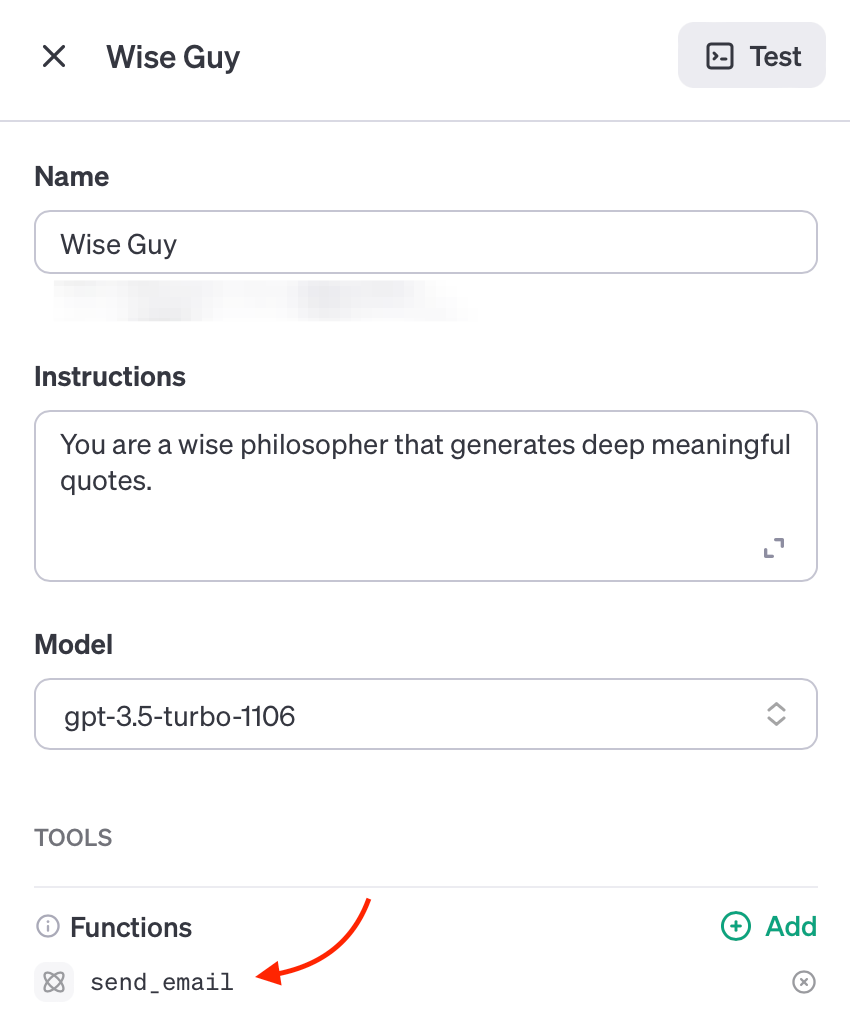
name="Wise Guy",
instructions="You are a wise philosopher that generates funny quotes.",
model="gpt-3.5-turbo-1106",
tools=tools
)
return assistantOur new "Wise Guy" AI Assistant
The create_assistant() will create a new assistant called Wise Guy with the given parameters. We also passed in the tools parameter which tells the Assistant that it has tools at its disposal in case it needs to use them.
That's where we tell the Assistant that it has a custom function it can use. Okay, let's do that and define our custom Function and add it to the tools variable.
function, retrieval, and code_interpreter. However, the OpenAI team announced that other tools will be added in the future as well as custom tools.Step 3: Define the custom Function as a tool
Just to recap, our Function takes in a quote and then sends it via email. First, let's define the function in Python:
Defining send_email in Python
def send_email(quote, recipient = "your@email.com"):
    #
    # ...
    print(f"Quote: {quote}\nSending to: {recipient}")
    return "Message sent to " + recipient
send_email function in Python
Next, let's inform the AI Assistant about our Function and its parameters.
JSON Function send_email definition
tools = [{
    "type": "function",
    "function": {
      "name": "send_email",
      "description": "Sends a quote via email",
      "parameters": {
        "type": "object",
        "properties": {
            "quote": {
                "type": "string",
                "description": "A generated funny quote"
            }
        },
        "required": [
            "quote"
        ]
      }
    }
}]
Let's break it down:
"type": "function": This lets the Assistant know that this tool is of typeFunction."parameters": Here, we let the Assistant know about the function parameters. In our case, we just have one property calledquoteand it isrequired.
Great! Remember in Step 2 we passed in the tools parameter? This is what we just defined and we'll pass it to our client.beta.assistants.create() method.
Step 4: Prompting the AI assistant
Prompting the AI Assistant requires that we execute a Run given a thread and an assistant and then wait for the response.
Creating our assistant
assistant = create_assistant()Create and assign our assistant to the assistant global variable
Creating a thread
thread = client.beta.threads.create()Threads and Runs.Prompting the assistant and waiting for a response
To prompt the model, we need to create a message within a thread using the client.beta.threads.messages.create method and then create a run using the client.beta.threads.runs.create method.
Here's what our send_and_run function:
def send_and_run(content):
    message = client.beta.threads.messages.create(
        thread_id=thread.id,
        role="user",
        content=content,
    )

    return client.beta.threads.runs.create(
        thread_id=thread.id,
        assistant_id=assistant.id,
    )
Since a run runs asynchronously, we'll need to wait until it finishes. OpenAI says streaming support is coming soon, in the meantime, we can poll the run's status property by using the client.beta.threads.runs.retrieve method, like so:
def wait_on_run(run):
    while run.status == "queued" or run.status == "in_progress":
        run = client.beta.threads.runs.retrieve(
            thread_id=thread.id,
            run_id=run.id,
        )

        time.sleep(0.5)
    return run
wait_on_run function in Python wait until run completes
Finally, we can simply call our send_and_run function and wait for the response:
run = wait_on_run(send_and_run("Create a funny quote and email it"))Executing our run and waiting for the status to change from queued or in_progress
Behind the scenes, a Thread was created with the following message: "Create a funny quote and email it" and then sent to our AI Assistant as we executed the Run.
After the run completes, we can inspect its contents to see whether the AI Assistant wants to use our custom send_email Function. Let's see how below.
Step 5: Check if the assistant needs to use our Function
Since the prompt contains "and email it", our AI Assistant will most likely decide to call our custom Function to execute this task.
We're looking for the requires_action status of the run which means that the model determined that a function should be called. The model also determined the names and arguments needed to call the function.
Let's check the run status and try to see if the assistant picked up the Function name and its associated arguments:
if run.status == "requires_action":

    tool_call = run.required_action.submit_tool_outputs.tool_calls[0]
    name = tool_call.function.name
    arguments = json.loads(tool_call.function.arguments)

    print("Waiting for custom Function:", name)
    print("Function arguments:")
    print(arguments)
Check if the status is now requires_action
Here's the response:
Waiting for custom Function: send_email
Function arguments:
{'quote': 'I told my wife she should embrace her mistakes. She gave me a hug. Then filed for divorce.'}
Not very funny, but it works! 🥳
Step 6: Call the Function from our Python code
Now the AI Assistant is waiting for us to execute the function and inform it that it's done.
Let's do it:
task = send_email(**arguments)Call send_email with the model's arguments
Step 7: Inform the model that the Function was called
We'll now let the Assistant know that the function was executed, by using the client.beta.threads.runs.submit_tool_outputs method as shown below:
run = client.beta.threads.runs.submit_tool_outputs(
    thread_id=thread.id,
    run_id=run.id,
    tool_outputs=[
        {
            "tool_call_id": tool_call.id,
            "output": "done",
        }
    ],
)
This executes a run with the tool_outputs parameters which lets the model formulate a proper response based on the Function's output.
output to "done" since we're just sending an email. In a real-world application, you may want to pass whatever your custom function returns.Step 8: Getting the final response from the model
In the previous step, we executed a run and provided the Assistant with the Function's response.
Now we're just going to wait until the run completes and print out the response by calling the client.beta.threads.messages.list method as shown here:
run = wait_on_run(run)

print(client.beta.threads.messages.list(thread_id=thread.id, order="asc"))
Getting model response after the run completes
SyncCursorPage[ThreadMessage](data=[ThreadMessage(id='msg_GxTLNJDPYe0dDDUnedDQLRHS', assistant_id=None, content=[MessageContentText(text=Text(annotations=[], value='Create a funny quote and email it'), type='text')], created_at=1701803371, file_ids=[], metadata={}, object='thread.message', role='user', run_id=None, thread_id='thread_g2PvjM4UdWNOAY1YlQ4dT6hu'), ThreadMessage(id='msg_tzzNFJodk7ksqVA1xu6tnlSA', assistant_id='asst_TsDAtpgi7EKAzWrV9lLKFgUT', content=[MessageContentText(text=Text(annotations=[], value='The funny quote has been sent via email!'), type='text')], created_at=1701803375, file_ids=[], metadata={}, object='thread.message', role='assistant', run_id='run_aib9MQMWgHnjp2ylGrbw4NJR', thread_id='thread_g2PvjM4UdWNOAY1YlQ4dT6hu')], object='list', first_id='msg_GxTLNJDPYe0dDDUnedDQLRHS', last_id='msg_tzzNFJodk7ksqVA1xu6tnlSA', has_more=False)
As you can see in the MessageContentText object the model responded with "The funny quote has been sent via email!". Beautiful, exactly what we need.
And that's a wrap!
Wrapping up
After you execute your code by running the python main.py command in your terminal, you can go to your OpenAI assistants page, where you should be able to see something similar to the below:
You could click on the Test button found at the top right of the screen to test your assistant in the Playground.
In this post, we've seen how we can use the OpenAI Assistants API to create an AI assistant that uses the Function Calling (or Functions) tool to perform a specific action beyond its native capabilities.
I'd love to know if you found this post helpful or if you have any questions or comments.
Thanks for reading! ❤️
Further readings
More from Getting Started with AI
OpenAI Assistants API official docs
- https://platform.openai.com/docs/assistants/overview
- https://platform.openai.com/docs/assistants/how-it-works
- https://platform.openai.com/docs/assistants/tools/function-calling
FAQ: Frequently asked questions
What is the Function Calling feature in the Assistants API?
Function Calling, referred to as "Functions", allows new OpenAI models like gpt-3.5-turbo-1106 and gpt-4-1106-preview to detect when a function should be invoked. This feature extends an AI Assistant's capabilities beyond native functionality.
What is an example use case of Function Calling?
A common use case is creating an AI assistant that can perform tasks beyond its native capabilities, like sending emails, getting the weather, querying databases, or calling external APIs. For instance, an assistant could generate a quote and use a custom send_email function to email it as we've seen in this post.
How to test an OpenAI AI Assistant?
Once you've created your AI Assistant and activated the necessary tools (such as Functions), you can visit your OpenAI Assistants page and test your assistant in the Playground.