LangChain Templates: A powerful collection of customizable chains and agents
Editing and customizing the internals of LangChain agents and chains is not a pleasant experience. LangChain Templates solves this issue by exposing the inner workings as downloadable templates.

Introduction to LangChain
Since I've been covering LangChain recently, I am not going to write yet another introduction about the framework.
If you're not familiar with LangChain, fear not! This blog is just for you. Go ahead and start here and come back when you're done.
I'll wait for you to finish. ⏳ 👀
Prompt Templates... NOT
Phew! Thanks to the posts here, you're now a LangChain Master, and we can move on. LangChain provides developers with Prompt Templates that act as placeholders allowing us to define LLM prompts quickly and easily.
Here's how a PromptTemplate works:
from langchain.prompts import PromptTemplate

prompt_template = PromptTemplate.from_template(
    "Tell me a {adjective} joke about {content}."
)
prompt_template.format(adjective="funny", content="chickens")
Source: https://python.langchain.com/docs/modules/model_io/prompts/prompt_templates/
But LangChain already has Prompt Templates you say! So how are LangChain Templates different? The similar names may confuse you but as we'll see in this post, they're not the same thing.
Here's why 👇
Exploring LangChain Templates
From the official docs:
LangChain Templates are the easiest and fastest way to build a production-ready LLM application. These templates serve as a set of reference architectures for a wide variety of popular LLM use cases. They are all in a standard format which make it easy to deploy them with LangServe.
As Harrison Chase, the co-founder of LangChain wrote in this ProductHunt comment, the need developers have to edit and customize the internals of the chains/agents prompted the creation of LangChain Templates.
Instead of having all the chains/agents as part of the Python library's source code, LangChain Templates now exposes all the inner workings of the relevant chains and agents as downloadable templates easily accessible directly within the application code.
Let's see how this works with the rag-conversation template one of the most popular LLM use-cases.

RAG Conversation Template
We're going to write just a few necessary lines of code for the example below, then, we'll take a look at how we can access the templates from within your project.
Let's get started! We'll need to do the following:
- Install the LangChain CLI
- Add a
rag-conversationTemplate to a new (or existing) Project - Review Directory Structure
- Deploy and Test (Optional)
- OpenAI and Pinecone API Keys required
Install the LangChain CLI
In your terminal window, type the following and hit return to install the LangChain CLI:
pip install -U "langchain-cli[serve]"Create a New LangChain Project
In your work directory, and using the newly installed LangChain CLI, let's use it to create our first app and include the rag-conversation package by specifying it using the --package flag, as shown below:
langchain app new testApp --package rag-conversationAfter the new project is created, we can navigate to the directory testApp. On your terminal type cd testApp and hit return.
You'll find the following directories in your project root:
- /app: This directory contains the base code that defines a FastAPI that will serve your application code.
- /packages: This directory will contain all LangChain Templates that you opt to install via the
langchain app new testApp --package <template-name>command.
Since we've installed the rag-conversation template we find it in the directory as expected:
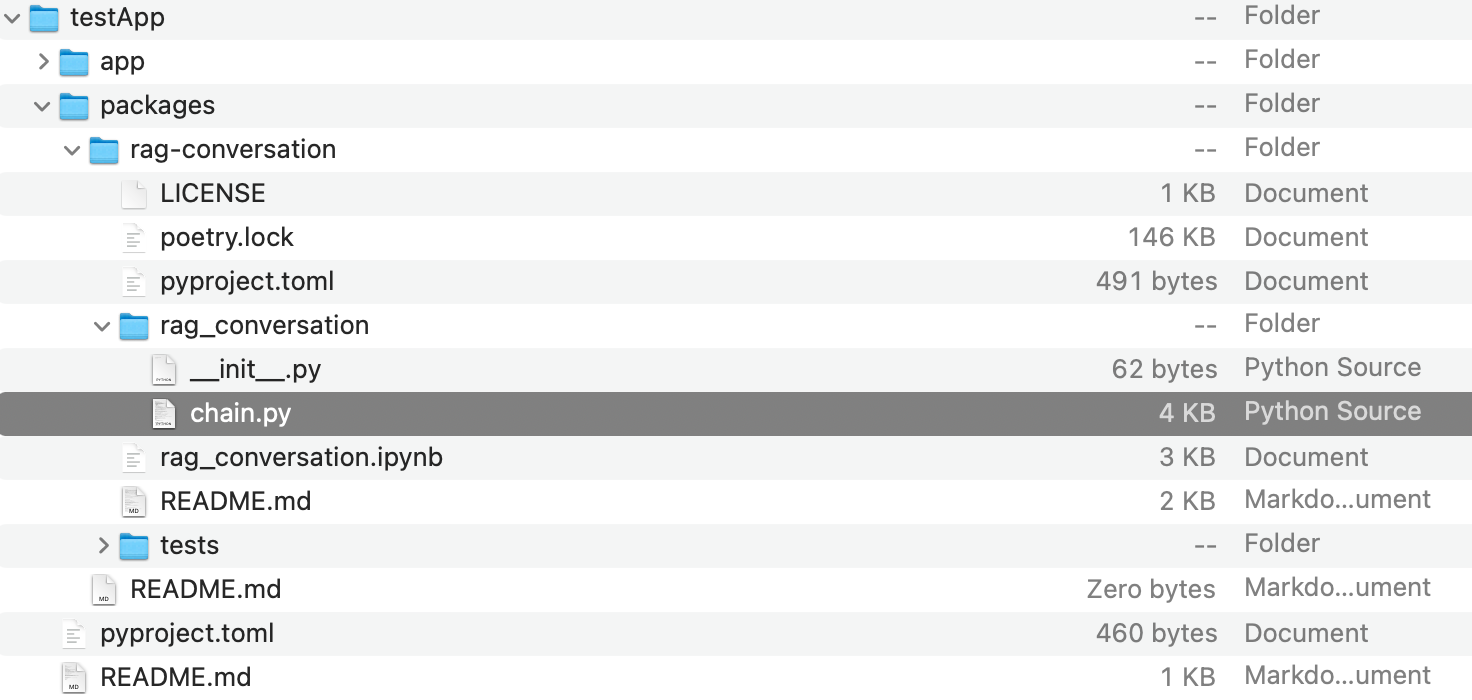
That's all we need to do, we can just navigate to the nested rag-conversation directory where we'll find the chain.py file (as shown above).
This file includes all of the required code to run this chain. That's where we can easily modify and customize the behaviour based on our application's specific needs.
Add to Existing LangChain Project
Alternatively, if you have an existing project and you'd like to install one or more LangChain Templates, you could use the following CLI command:
langchain app add rag-conversationRunning the LangChain Template (Optional)
To run the template, we'll just need to import our chain and register the FastAPI route so we can test it (below). Here's how we can do this:
Go to server.py and import the chain by adding the following:
from rag_conversation import chain as rag_conversation_chainThen, simply register the FastAPI route by adding the following:
add_routes(app, rag_conversation_chain, path="/rag_conversation")Setting OpenAI Key
Let's go ahead and add our OpenAI API Key by typing the following into our terminal: export OPENAI_API_KEY="YOUR_API_KEY_HERE"
If you don't have an OpenAI Key, you'll need to get your credit card out and sign into your OpenAI account to generate a key.
Pinecone Set Up
If you don't have a Pinecone account, you can create a free one here. Let's go ahead and create our index.
Creating Pinecone Index
From your Pinecone account, go to the Indexes tab and click on 'Create Index'. You can use the following settings:
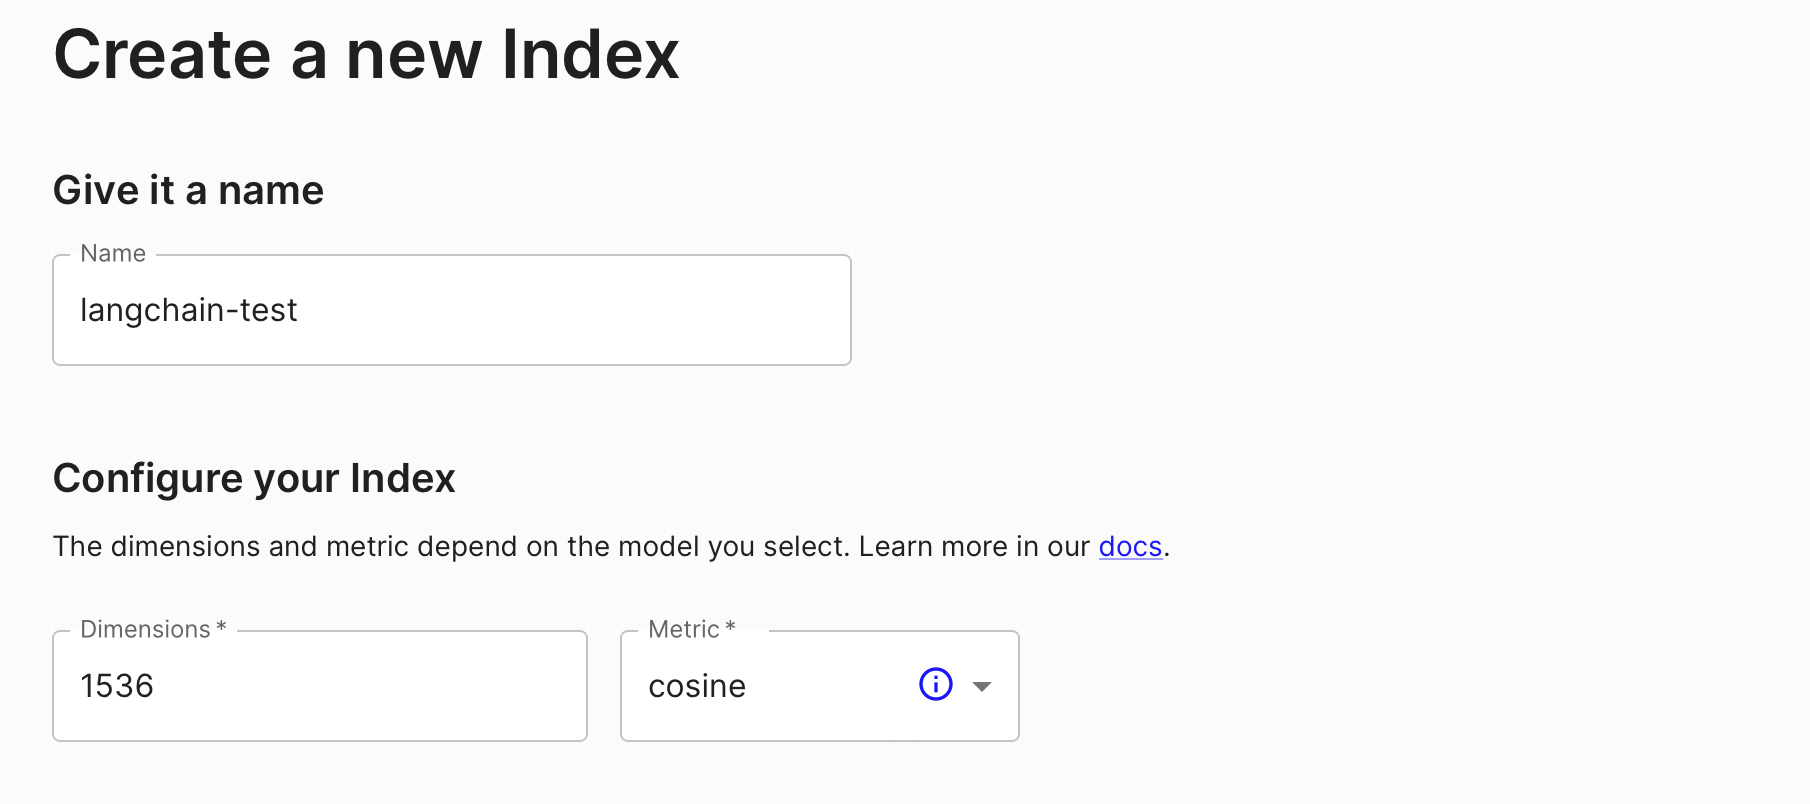
Make sure the index name here langchain-test matches the one specified on line 26 in the chain.py file. It is langchain-test by default so you can skip this step if you haven't customized the name.
Pinecone API Keys
From your Pinecone account, go to the Indexes tab and click on 'Create Index'. You can use the following settings:
To add your Pinecone API Keys we'll need to type the following into our terminal:
# Grab your Pinecone API Key
export PINECONE_API_KEY="YOUR_PINECONE_API_KEY_HERE"

# Modify to match your Pinecone environment name
export PINECONE_ENVIRONMENT="YOUR_ENV_NAME"
Pinecone Project Settings
Note: The environment name is visible in the Indexes tab for each index from the list.
Running the Project
chain.py file. It's safe to comment them back after the initial run.LangChain CLI
Finally, to test the template, we can use LangServe and launch the project by typing the following in the terminal: langchain serve and hit return:
Bam! 🎉🎉🎉

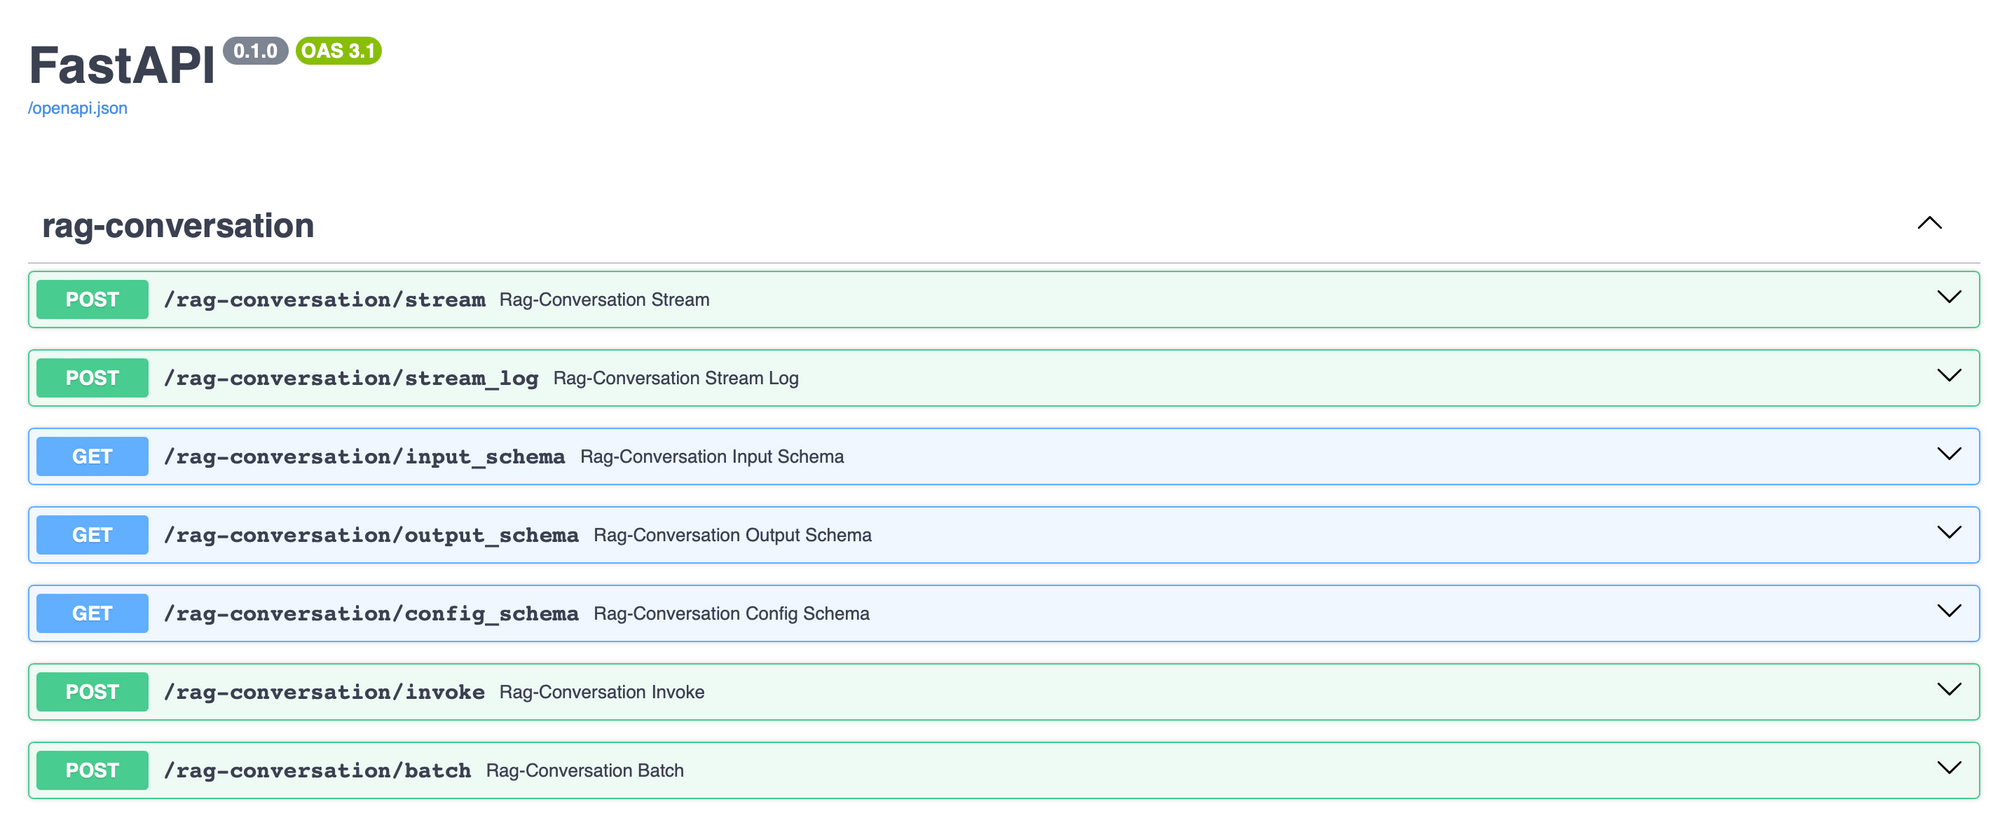
Swagger Docs
Now if you head over to http://0.0.0.0:8000/docs on your machine, you should be able to see the FastAPI generated Swagger docs for the LangChain Template we just set up!
Testing the Template via Jupyter Notebook
Super, to quickly test our LangChain Template via the RESTful API we just launched we'll need Jupyter Notebook.
Go ahead and launch Jupyter Notebook by typing the following into your terminal window and then hitting return:
jupyter notebookOnce the notebook loads up and the kernel is ready, copy and paste the below code into the first cell and hit run (or CMD+Return):
from langserve.client import RemoteRunnable

rag_app = RemoteRunnable("http://0.0.0.0:8000/rag-conversation")

question = "How does agent memory work?"
answer = rag_app.invoke(
    {
        "question": question,
        "chat_history": [],
    }
)

print(answer)
The application should respond with something similar to the below:
The agent memory consists of two components: the memory stream and the retrieval model. (Etc...)
Of course, this is based on the vector embeddings from the ingested demo URL provided in the LangChain Template code on line 31 in chain.py. Obviously, you could modify this to ingest data from whichever source you'd like.
Troubleshooting
- It's important we execute the steps above in a virtual environment to prevent unexpected issues with
pipinstallations. - This tutorial was tested using
Python 3.10if you experience issues with theaiohttppackage double check your Python version. - If you're getting a
RuntimeError: no validator found for <class 'rag_conversation.chain.ChatHistory'>, see 'arbitrary_types_allowed' in Configdowngrade yourpydanticpackage to version1.10.8
Final Thoughts
Awesome! We've done a lot in this post and LangChain Templates were just released a few hours ago. It's really interesting to see all the great features coming to the framework in such a short time it's hard to keep up. Great work by the LangChain team 👏👏👏
I'd love to know how you plan on integrating these templates in your application so please share your comments, feedback, and questions in the comments below.
Finally, here's the official GitHub repo that contains all of the launched LangChain Templates:
 langchain-ai
Source: https://github.com/langchain-ai/langchain/tree/master/templates
Hope you found this helpful in your coding journey. If you have, I'd really like to connect with you to learn more about your business and what you're building. So please follow me on X and make sure you subscribe for free to the blog so you're always one step ahead of everyone else.
Cheers 🍻