Connecting AutoGen Agents to Any MCP Server
Your AutoGen agents are already smart, but what if they could be 10x more powerful? In this tutorial, I show you how to connect your agents to an MCP Server, giving them access to a whole new world of tools and capabilities.


Ready to give your AutoGen agents more power? This guide shows you how to connect your app to any MCP Server, whether it's running locally or remotely, giving your agents access to powerful new tools and capabilities.
We'll set up a simple Python app with a team of three agents. Then, we'll use the autogen-ext[mcp] extension to set up the MCP server connections. You'll see how easy it is to pull all available tools from the server with the mcp_server_tools helper function.
All this in under 8 minutes! Let's get started.
What you'll need
For this project, we'll be using a few packages:
autogen-agentchat: The core package for defining our agents.autogen-ext[openai]: We'll use this to connect to the OpenAI API since we're using GPT-4o for this example.autogen-ext[mcp]: This is the AutoGen MCP extension that provides support for the MCP protocol.mcp-server-fetch: A simple MCP server that provides a tool to pull content from the web.
Here's what my requirements.txt looks like:
autogen-agentchat
autogen-ext[openai]
autogen-ext[mcp]
mcp-server-fetch
In a previous video, we built an MCP Server using the C# MCP SDK. This server exposes echo and reverse_echo tools. We'll be using that same server today along with the mcp-server-fetch. If you missed that video, especially if you're a C# developer, check it out here.
We'll stick with Docker for this project as well. I have a Dockerfile that sets up a Python environment and installs the necessary packages.
FROM python:3.11

RUN apt-get update && apt-get install -y \
    docker.io \
    ca-certificates \
    curl \
    git \
    gnupg \
 && curl -fsSL https://deb.nodesource.com/setup_18.x | bash - \
 && apt-get install -y nodejs \
 && rm -rf /var/lib/apt/lists/*

WORKDIR /app

COPY requirements.txt .
RUN pip install --no-cache-dir -r requirements.txt

COPY . .

CMD ["python", "app.py"]
I'm also using docker-compose to manage this project, and it's set up to depend on the C# MCP server we built before. If you're not using Docker, don't worry since you can just download all the packages and set up everything directly on your machine.
services:
  app:
    build: .
    volumes:
      - .:/app
      - /var/run/docker.sock:/var/run/docker.sock
    depends_on:
      - mcpcsharp-server
    env_file:
      - .env
    stdin_open: true
    tty: true

  mcpcsharp-server:
    image: mcpcsharp/server
    container_name: mcpcsharp-server
    stdin_open: true
    tty: true
For this app, we'll be using GPT-4o, so you'll need access to the OpenAI API. Make sure you have your OPENAI_API_KEYready. I've already set this up by adding my key to a .env file, and Docker will handle loading it for us.
What is MCP?
AI agents need tools to perform tasks, and the Model Context Protocol (MCP) standardizes how models interact with those tools. Think of it like a USB-C connector. Just as USB-C replaced dozens of different cables with a single standard, MCP replaces the need for a custom integration for every service.
This means you can build an MCP Server that exposes custom tools like connecting to a company database or calling an external API and then any AI agent that supports the MCP standard can immediately discover and use those tools.
Code time!
Here's a quick look at the project's imports:
import time
import sys
import asyncio
from autogen_agentchat.ui import Console
from autogen_agentchat.agents import AssistantAgent, UserProxyAgent
from autogen_agentchat.conditions import TextMentionTermination
from autogen_agentchat.teams import SelectorGroupChat
from autogen_ext.models.openai import OpenAIChatCompletionClient
from autogen_ext.tools.mcp import (
    StdioServerParams,
    mcp_server_tools
)
First, we need to handle user input. We'll create a simple async_input function to use with our user_proxy agent.
async def async_input(prompt="", *args, **kwargs) -> str:
    loop = asyncio.get_event_loop()
    return await loop.run_in_executor(None, input, prompt)
Next, let's set up our model. We've chosen GPT-4o, so we'll create an OpenAIChatCompletionClient. Our OPENAI_API_KEY is already loaded, so we're good to go.
model_client = OpenAIChatCompletionClient(model="gpt-4o")Now we'll set up two different MCP servers: the Python-based fetch server (mcp-server-fetch) and our C# MCP server. Both communicate over standard input and standard output, so we'll use the StdioServerParams class.
The AutoGen MCP extension also fully supports the new Streamable HTTP transport for remote connections. The older SSE transport is now deprecated in the MCP standard and has been replaced by Streamable HTTP. If you're using a server with either of these, you'd use theSseServerParamsorStreamableHttpServerParamsclasses, which require a URL.
# mcp-server-fetch
server_params = StdioServerParams(
    command="python",
    args=[
        "-m"
        "mcp_server_fetch"
    ],
    read_timeout_seconds=60
)

# local csharp mcp server
local_server = StdioServerParams(
    command="docker",
    args=[
        "exec",
        "-i",
        "mcpcsharp-server",
        "dotnet",
        "server.dll"
    ]
)
This is the great part! We'll use the mcp_server_tools helper function. It takes our server parameters and automatically creates all the tool adapters our agents need. We'll run this function once for each server.
fetch_tools = await mcp_server_tools(server_params)
csharp_tools = await mcp_server_tools(local_server)
Now, let's define our three agents:
- Assistant: This agent will use the tools from our C# MCP server. I've given it a system prompt that asks it to always reverse its own message before responding, which forces it to use the
reverse_echotool. - Fetcher: This agent will use the tools from the
mcp-server-fetchserver to get information from the web. - User Proxy: This agent represents me (the user) and will relay what I type into the console to the other agents. It doesn't need a model since an LLM isn't used here.
Here's what the agents setup looks like:
assistant = AssistantAgent(
    name="assistant",
    tools=csharp_tools,
    model_client=model_client,
    system_message=
    '''
        You are a helpful assistant that writes engaging tweets.
        Your only rule is to provide your response reversed.
    '''
)

fetcher = AssistantAgent(
    name="fetcher",
    model_client=model_client,
    tools=fetch_tools,
    system_message="You are a helpful assistant that can fetch information from the web."
)

user_proxy = UserProxyAgent(
    name="user_proxy",
    input_func=async_input
)
Finally, let's set up our AutoGen team. I'm using the SelectorGroupChat class, which requires a model_client. Depending on your use case, you might choose something else. I have a complete video that dives deep into the different team types the AutoGen framework supports, it's worth checking out.
termination = TextMentionTermination("TERMINATE")
team = SelectorGroupChat(
    [assistant, user_proxy, fetcher],
    model_client=model_client,
    termination_condition=termination
)
Let's try it out!
Now we're ready to run the team and test everything in the terminal.
If you're using Docker, just run: docker-compose run --rm app
And then, I'm going to try this prompt: Tell me what gettingstarted.ai is all about in a couple of words and reverse your response
And there you go!
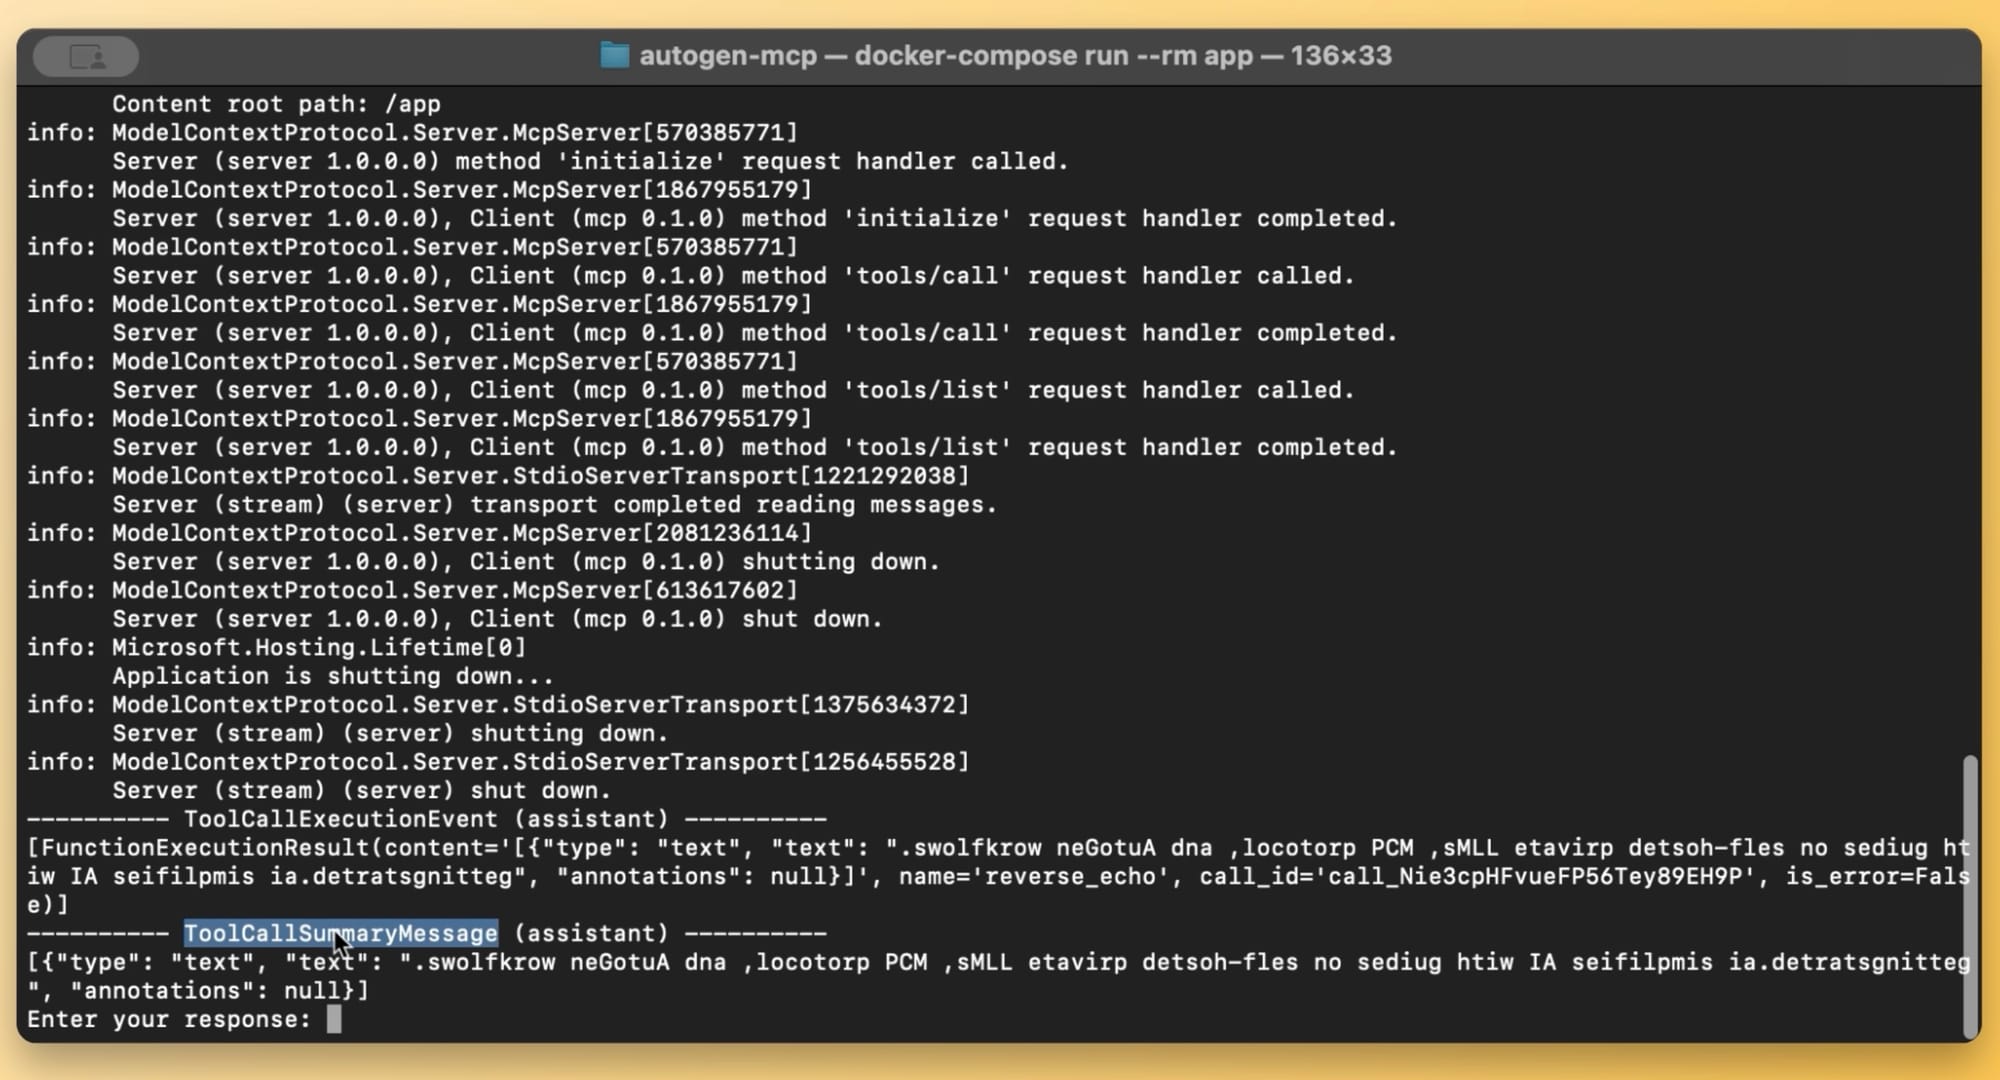
ToolCallSummaryMessage: End result after AutoGen team runYour agents can now communicate with MCP servers and use their tools.
Piece of cake!